How to Improve Your HYROX Sled Pull (Even If You Don't Have a Sled)
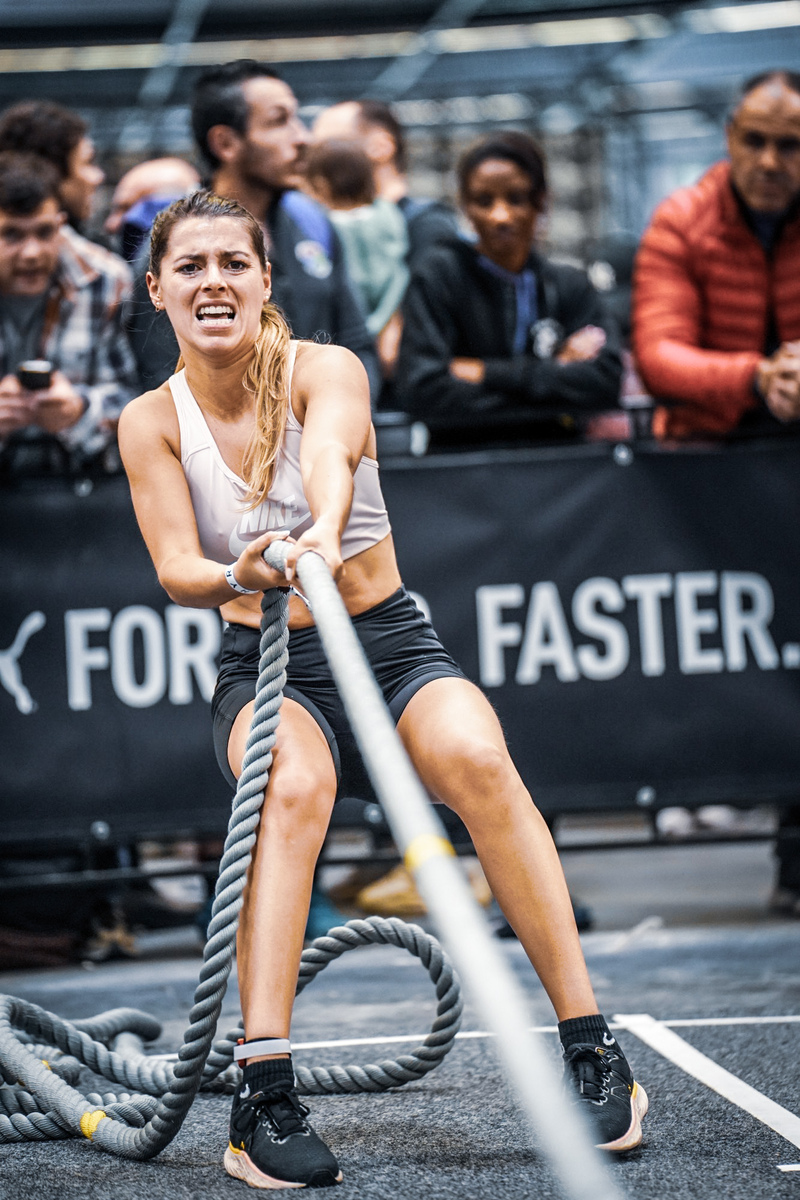
In HYROX®, the sled pull is a perfect storm of physics, unfamiliar mechanics and brutal local fatigue. It's also one of the easiest stations to “fix” with the right training, even if your gym doesn't own a sled.
This guide breaks down:
- Why the sled pull feels so hard.
- Technique details that instantly make it easier.
- How to train the key muscles and patterns without a sled.
- Plug‑and‑play plans you can drop into HYROX® prep.
Use it as an athlete playbook or a coaching reference.
Why the HYROX® Sled Pull Feels So Hard
1. Friction > load
On paper, the sled weight doesn't look crazy. In reality, you're fighting friction, not just the plates.
On carpet or turf, you have to overcome:
- Static friction to get the sled moving.
- High kinetic friction to keep it sliding.
The normal force (how hard the sled is pushed into the floor) + surface + load position all change how “heavy” it feels. Research on resisted sled sprinting shows that friction characteristics massively influence the real load the athlete feels and the horizontal force they can produce. (Cross et al., 2017; Martínez‑Valencia et al., 2015; Cross et al., 2017b; Salazar‑Orellana et al., 2025).
What that means for HYROX®:
- Same plates can feel 10–20% harder on one venue than another.
- If plates are stacked low and the carpet is tacky, it's going to bite.
2. Awkward mechanics
You're usually pulling hand‑over‑hand while sitting or braced standing, then finishing with backward walking under tension. Most athletes never train:
- Thick‑rope pulling at high effort.
- Backward locomotion under load.
So you hit a pattern you're not used to at a race‑level intensity.
3. Local occlusion = instant pump
Hands, forearms and lats spend a lot of time in near‑isometric contraction to hold the rope and keep tension. That restricts blood flow, so you get:
- Rapid forearm and lat burn.
- “My grip is gone” even when lungs feel okay.
4. Brace vs breathe conflict
You need to keep ribs stacked and abs on while you breathe under load. Many athletes:
- Hold their breath.
- Lose rib position, dump into their low back.
- Spike heart rate and red‑line early.
5. Pre‑fatigue and pacing errors
You hit sled pull after a run and the sled push. If you come in too hot:
- Lactate is already high.
- Grip is pre‑fatigued.
- Quads are cooked from push and runs.
Result: the first 12.5 m feels “fine”, the rest feels like a wall.
6. Footwear and traction
Soft, squishy shoes and slippery soles kill your backward drive. Weak soleus and tibialis mean:
- You slide on every step.
- You can't get good force into the ground.
Backward treadmill and over‑ground walking studies show that backwards walking increases quadriceps and soleus activation and can be used to build knee‑dominant strength with lower joint stress (Cipriani et al., 1995; Kim et al., 2016; Alghadir et al., 2016; Wu et al., 2020; Almutairi et al., 2023).
Technique 101: Quick Race‑Ready Cues
Use these on every lap, even in training.
- Set your base: feet shoulder‑width, knees soft, hips back, torso slightly leaning away from the sled.
- Keep the rope low and taut: around beltline height, straight line to the sled. No slack.
- Brace first, then pull: exhale gently, ribs down, lats “locked” before each pull.
- Hand‑over‑hand cadence: short pulls to ribs/hips → quick re‑grip → repeat. Smooth, no jerky yanks.
- Reset smart: when the rope runs out, walk it back quickly, shake out forearms, re‑brace, then go again.
Hand‑Over‑Hand vs Backward Drag (What Changes?)
Hand‑over‑hand (upper‑body dominant)
Primary: lats, mid/low traps, rhomboids, posterior delts, biceps, forearms, trunk anti‑flexion.
Secondary: glutes and hamstrings via your lean and heel drive.
Good when:
- Grip and lats are relatively fresh.
- Surface is very high friction and you need powerful “pulses” to break it free.
Pull‑and‑walk‑back (continuous backward drag)
You keep the rope tight and walk backward under tension.
Primary: quads (especially VMO), calves/soleus, glutes, trunk anti‑extension.
Secondary: lats and forearms just to keep rope tension.
Good when:
- Grip is a limiter (you use less hand‑over‑hand volume).
- You want to maintain momentum with short, quick steps.
Coach note: train both. Open a lap with powerful hand‑over‑hand sets, then finish with fast backward steps to keep the sled gliding when you're tired.
What Makes the Sled Pull Harder (And How to Manage It)
- Surface friction: carpet/turf > rubber. When you can, practice on higher‑friction surfaces, and in programming think in time per 12.5 m rather than just load.
- Rope: thicker or softer = more grip demand. Train with towels/fat grips to prepare.
- Rope angle: lower angle = more friction and more lat. Keep rope low and centred to your beltline; avoid curling it up with biceps.
- Load distribution: plates stacked low increase friction. Occasionally practise with plates low.
- Fatigue state: pulling after heavy push/run will feel 10–20% harder. Simulate this in training by pairing pulls with run intervals.
- Footwear and traction: flat, grippy soles; no ultra‑soft racing foam here.
Train the Qualities, Not the Equipment
You can build almost everything the sled pull needs with smart substitutes. Think:
- Upper‑back and lats → hand‑over‑hand engine.
- Quads and soleus → backward drive.
- Posterior chain and global brace → hold a good lean with rope low.
- Grip and forearms → thick‑rope, high‑friction tolerance.
- Trunk stiffness and anti‑rotation → keep the rope path clean.
- Ankles and feet → traction and push‑back.
A. “Feels like a sled” substitutes (no sled needed)
Pick 1–2 of these in your sled‑specific sessions.
Plate or sandbag drags (rope or towel)
- Thread a rope or long towel through a plate or sandbag.
- Sit or stand tall and pull hand‑over‑hand to your ribs/hips.
- Keep rope low, no slack.
Why it works: friction on the floor + rope action mimics HYROX® pulls.
Prescription:
- 4–6 × 20–30 s @ RPE 7–8, 60–75 s rest.
Tire drags (rope)
- Same idea, but a tyre usually adds more friction.
Why it works: higher friction builds realistic pulling force and grip fatigue, similar to heavy sled towing in sprint training that increases horizontal force output (Cross et al., 2017b; Morin et al., 2017; Salazar‑Orellana et al., 2025).
Band‑belt backward walks
- Heavy band around a rig/post, clipped to a dip belt or around your waist.
- Short, quick backward steps with constant tension, upright torso.
Why it works: very close to the race “backward drag” pattern and lines up with research showing backward walking strongly loads quads and soleus while being knee‑friendly (Cipriani et al., 1995; Kim et al., 2016; Alghadir et al., 2016; Wu et al., 2020; Torun et al., 2025).
Prescription:
- 5 × 45–90 s @ RPE 7–8, short steps, 60–90 s rest.
Wall‑sit rope rows
- Sit in a wall‑sit around 90°, neutral spine.
- Row a rope or cable to the ribs, keep lats on and knees out.
Why it works: nasty combo of trunk brace, quads and lats under constant tension.
Prescription:
- 3–4 × 20–30 pulls @ RPE 7–8, controlled tempo (2 s pull, 1 s hold).
B. Upper‑back & lat engine (hand‑over‑hand strength)
Choose 1–2 on upper‑body strength days.
- Chest‑supported row or seal row – 4 × 6–8 @ RPE 7–8, 2‑1‑1‑0 tempo.
- Rope/neutral‑grip cable rows – 3–4 × 10–12, 2‑1‑1‑1 + 10–20 s hold on last rep.
- Straight‑arm pulldown – 3 × 12–15, 2‑1‑1‑1, ribs down.
- Single‑arm DB or landmine row (towel handle) – 3–4 × 8–10/side; hips square, no torso twist.
- Towel/rope pull‑ups or hangs – 3–5 × 3–8 reps or 15–30 s hangs.
These give you the same horizontal pulling and lat “lock” that resisted sled sprinting uses to boost acceleration (Martínez‑Valencia et al., 2015; Alcaraz et al., 2009; Cross et al., 2017b; Toneck, 2021; Salazar‑Orellana et al., 2025).
C. Quad‑dominant “backward drive”
These make backward steps feel strong instead of panicky.
- Heel‑elevated goblet or front squats – 4 × 8–10 @ RPE 7–8, 3‑0‑1‑1.
- Spanish squats (band behind knees) – 3 × 12–15, 2‑1‑1‑1.
- Short‑stance split squats (heel elevated) – 3–4 × 8–10/side.
- Backward treadmill walking (incline) – 5 × 1–2 min @ RPE 6–7, short steps.
- Poliquin step‑ups / assisted sissy squats – light–moderate, 3 × 8–12/side.
Backward walking and incline retro‑treadmill work are well‑supported for improving quadriceps strength, function and pain in knee osteoarthritis while keeping joint stress manageable (Cipriani et al., 1995; Kim et al., 2016; Alghadir et al., 2016; Wu et al., 2020; Almutairi et al., 2023; Zych et al., 2021).
D. Posterior chain & global bracing
These support the lean and rope‑low position.
- Trap‑bar deadlift – 4 × 4–6 @ RPE 7–9. Use 3‑0‑1‑1 tempo for 3–4 weeks, then faster concentric.
- Rack pulls (below or at knee) – 4–5 × 3–5 @ RPE 8–9, 2‑0‑1‑1.
- Isometric mid‑thigh pulls vs pins – 4–6 × 3–5 s all‑out, excellent in peak weeks.
- Romanian deadlifts – 3–4 × 6–8 @ RPE 7–8, 3‑1‑1‑1.
- Hip thrusts – 4 × 8–10 @ RPE 7–8.
Very‑heavy sled sprint studies show that improvements in horizontal force come from better ground‑force application, not just more “muscle,” and those same patterns are built with heavy hinge and isometric pulls (Morin et al., 2017; Salazar‑Orellana et al., 2025).
E. Hamstrings: Nordics & friends
Hamstrings help control your hip and knee under load and protect you from injury while you're doing lots of running and pulling.
- Nordic curls (eccentric‑only to start) – 4 × 3–5 with 5–6 s lowers, push‑up back up.
- Progress to band‑assisted full Nordics 3 × 4–6.
- GHD hip extensions – 3 × 10–12, 2–2 tempo.
- Sliding leg curls (towel/slider) – 3–4 × 8–12.
Include 15–25 high‑quality Nordic reps per week at first. Large meta‑analyses show that adding Nordic hamstring work to team‑sport training can reduce hamstring injury risk by ~50% (van der Horst et al., 2015; van Dyk et al., 2019; Impellizzeri et al., 2021; Nunes et al., 2024; Podczarska‑Głowacka et al., 2025).
F. Grip & forearms
If your grip dies, your sled dies.
- Farmer carries (heavy) – 3–4 × 20–40 m @ RPE 7–8.
- Suitcase carries – 3–4 × 20–40 m/side.
- Plate pinches – 3–4 × 15–30 s.
- Towel hangs / towel pull‑ups – 3–5 rounds of 20–40 s hangs or 3–8 reps.
- Wrist roller or thick‑grip holds – 2–3 rounds each direction.
G. Trunk & anti‑rotation
These keep your torso quiet and rope path straight.
- Dead bug + band reach – 3 × 6–10/side.
- Pallof press holds or steps – 3 × 20–40 s or 6–10 steps/side.
- Side plank (with row or top‑leg lift) – 3 × 20–40 s/side.
- Offset front‑rack or Zercher carries – 3 × 20–30 m.
H. Foot & ankle (traction)
- Seated calf raises + mid‑range isometric – 3 × 10–15 reps, hold final rep 30 s.
- Soleus raises (knee‑bent) – 3 × 12–20.
- Backward heel walks – 3 × 20–30 m.
- Short‑foot drills / toe‑yoga – 2 × 60–90 s.
No Sled? Two Simple Mini‑Plans
1. 10–12 Minute “Fix” Plan (2×/week add‑on)
Run this at the end of your strength or HYROX® sessions for 3 weeks.
Block A (3 weeks):
1. Hand‑over‑hand drags/rows
- 6 × 20–25 s @ RPE 7–8
- No slack, rope low, smooth pulls.
2. Belted/backward walks or reverse deadmill
- 6 × 30–40 s (short steps) @ RPE 7–8.
3. Grip finisher:
- Towel hang 3 × 20–30 s or plate pinches 3 × 20 s.
After 3 weeks, keep 1 session/week as maintenance. In race week, just do 2–3 light technique sets of each.
2. Weekly Structure: 2 Strength Days + 1 Sled‑Specific Day
Day 1 – Upper‑back / Grip bias (45–55 min)
- Chest‑supported or seal row – 4 × 6–8.
- Rope or neutral‑grip cable row – 3–4 × 10–12 + 10–20 s iso.
- Straight‑arm pulldown – 3 × 12–15.
- Towel pull‑ups or hangs – 3–5 sets.
- Suitcase or farmer carry – 3–4 × 20–40 m.
Day 2 – Quad / Posterior‑chain bias (45–55 min)
- Heel‑elevated goblet or front squat – 4 × 8–10 (tempo 3‑0‑1‑1 for 3–4 weeks, then faster).
- Trap‑bar deadlift – 4 × 4–6.
- Nordic curls (ecc‑only) or GHD hip extensions – 3–4 sets.
- Backward band‑belt walks – 5 × 60–90 s.
- Plate pinches – 3 × 20–30 s.
Day 3 – Sled‑specific / capacity (30–40 min)
4–6 rounds @ RPE 7–8 of:
- 20–30 s hand‑over‑hand drags/rows.
- 20–30 m backward walk under tension.
- 60–90 s easy jog or walk (simulate the run to the station).
Simple Benchmarks to Track
- Time to cover your “12.5 m equivalent” (e.g., distance dragged in 25–30 s at a fixed set‑up).
- Distance walked backward in 30–40 s at a fixed band tension.
- Forearm fatigue rating 1–10 after your pulling sets – aim to reduce this at the same output over weeks.
- How often you have to stop during sled pull efforts in sims and classes.
Common Errors and Fast Fixes
- Yanking with biceps → think “ribs down, shoulders in back pockets,” then arms move.
- Long, slow backward steps → shorten the stride and speed up cadence.
- Slack in the rope → take a micro‑step or small lean to preload before you pull.
- Rounded upper back → proud chest, exhale as you brace.
- Letting the sled fishtail → centre the rope and keep your line straight.
- Coming in gassed from the run → practise run‑into‑pull combos at realistic race pace so your body knows the feeling.
Putting It All Together
Even without a sled, you can build:
- The horizontal force and sprint‑style strength that resisted sled training is famous for (Cross et al., 2017; Martínez‑Valencia et al., 2015; Alcaraz et al., 2009; Cross et al., 2017b; Salazar‑Orellana et al., 2025).
- The quad/soleus engine and backward gait that rehab and performance studies use to improve strength and reduce knee stress (Cipriani et al., 1995; Kim et al., 2016; Alghadir et al., 2016; Wu et al., 2020; Almutairi et al., 2023; Zych et al., 2021; Torun et al., 2025).
- The hamstring robustness that keeps you healthy through more running and pulling (van der Horst et al., 2015; van Dyk et al., 2019; Impellizzeri et al., 2021; Nunes et al., 2024; Podczarska‑Głowacka et al., 2025).
The goal isn't to make the sled feel “easy” – it's to make it predictable. When you know exactly how your body will respond and how to pace each lap, you stop fearing the station and start using it to move up the leaderboard.
References:
Alcaraz, P. E., et al. (2009). Determining the optimal load for resisted sprint training with sled towing. Journal of Strength and Conditioning Research.
Alghadir, A. H., et al. (2016). Effect of retro and forward walking on quadriceps muscle strength and pain in patients with knee osteoarthritis. Clinical Interventions in Aging.
Almutairi, S. M., et al. (2023). Effects of backward walking exercise using lower body positive pressure support in patients with knee osteoarthritis. Healthcare.
Cipriani, D. J., et al. (1995). Backward walking at three levels of treadmill inclination: kinematics and EMG. Journal of Orthopaedic & Sports Physical Therapy.
Cross, M. R., et al. (2017). Determining friction and effective loading for sled sprinting. Journal of Sports Sciences.
Cross, M. R., et al. (2017b). Optimal loading for maximizing power during sled-resisted sprinting. International Journal of Sports Physiology and Performance.
Kim, W., et al. (2016). The effects of forward and backward walking according to treadmill inclination on lower limb muscular activation. Journal of Physical Therapy Science.
Martínez‑Valencia, M. A., et al. (2015). Effects of sled towing on sprint performance and force production. Journal of Strength and Conditioning Research.
Morin, J.‑B., et al. (2017). Very‑heavy sled training for improving horizontal force output in soccer players.
Nunes, H., et al. (2024). The effects of Nordic hamstring exercise on performance and injury risk: a systematic review.
Salazar‑Orellana, C., et al. (2025). Effects of resisted sled training on sprint performance in team‑sport athletes: systematic review and meta‑analysis.
Torun, M. C., et al. (2025). Backward locomotion as a novel strategy for enhancing lower‑extremity neuromuscular activation. Applied Sciences.
van der Horst, N., et al. (2015). The preventive effect of the Nordic hamstring exercise on hamstring injuries in amateur soccer players. American Journal of Sports Medicine.
van Dyk, N., et al. (2019). Including the Nordic hamstring exercise in injury prevention programmes halves hamstring injury rates: systematic review and meta‑analysis. British Journal of Sports Medicine.
Wu, Y., et al. (2020). Effect of backward walking training on knee osteoarthritis: randomized clinical trial. BMJ Open.
Zych, M., et al. (2021). Forward and backward walking share the same motor synergies. Heliyon.
Disclaimer
This material is for educational and general information purposes only. It does not replace:
- Personal medical advice.
- Individualised assessment by a qualified coach, physiotherapist or healthcare professional.
Before starting or changing any exercise programme, especially high‑intensity training like HYROX® or heavy pulling, consult your doctor or other qualified professional—particularly if you have:
- Existing injuries or joint issues.
- Cardiovascular, respiratory or metabolic conditions.
- Any other medical concerns that could be affected by intense exercise.
All training plans are templates, not prescriptions. Use at your own risk, scale sessions to your current fitness and movement capacity, and stop immediately if you experience pain, dizziness, chest discomfort or anything that feels “wrong”.